Codex Subagents in Action: Building a Browser Game from Scratch
The previous two articles were about having AI process existing code. This one levels up: developing a product from scratch. You'll see how to use multiple agents to collaborate and develop a space shooter game that runs directly in the browser, from design documents and visual assets to testing and validation, walking through the entire process.
Before You Start: Two Configuration Files
PLAN.md: First "Write Down" the Game Clearly, Then Let AI Get to Work
Create a PLAN.md file in the project root directory, and write in all the core logic, control methods, and win/loss conditions of the game. Below is a complete example:
# Space Shooter Game PLAN.md
## Player Goal
Destroy all enemy ships while keeping the player ship's health above zero.
## Main Loop
Enemy ships continuously spawn from the top of the screen. The player ship moves horizontally at the bottom and shoots.
Destroying enemies earns points. Enemy bullets hitting the player deduct health. Every 30 seconds, a wave of faster enemies appears.
## Input Controls
- Keyboard: Arrow keys to move, Space to shoot
- Touch: Swipe left/right to move, tap to shoot
## Win/Loss Conditions
- Win: Clear 5 levels, eliminating the required number of enemies per level
- Lose: Health reaches zero
## Difficulty Progression
Higher levels mean faster enemy speed, denser bullets, and slightly increased enemy health
## Visual Style
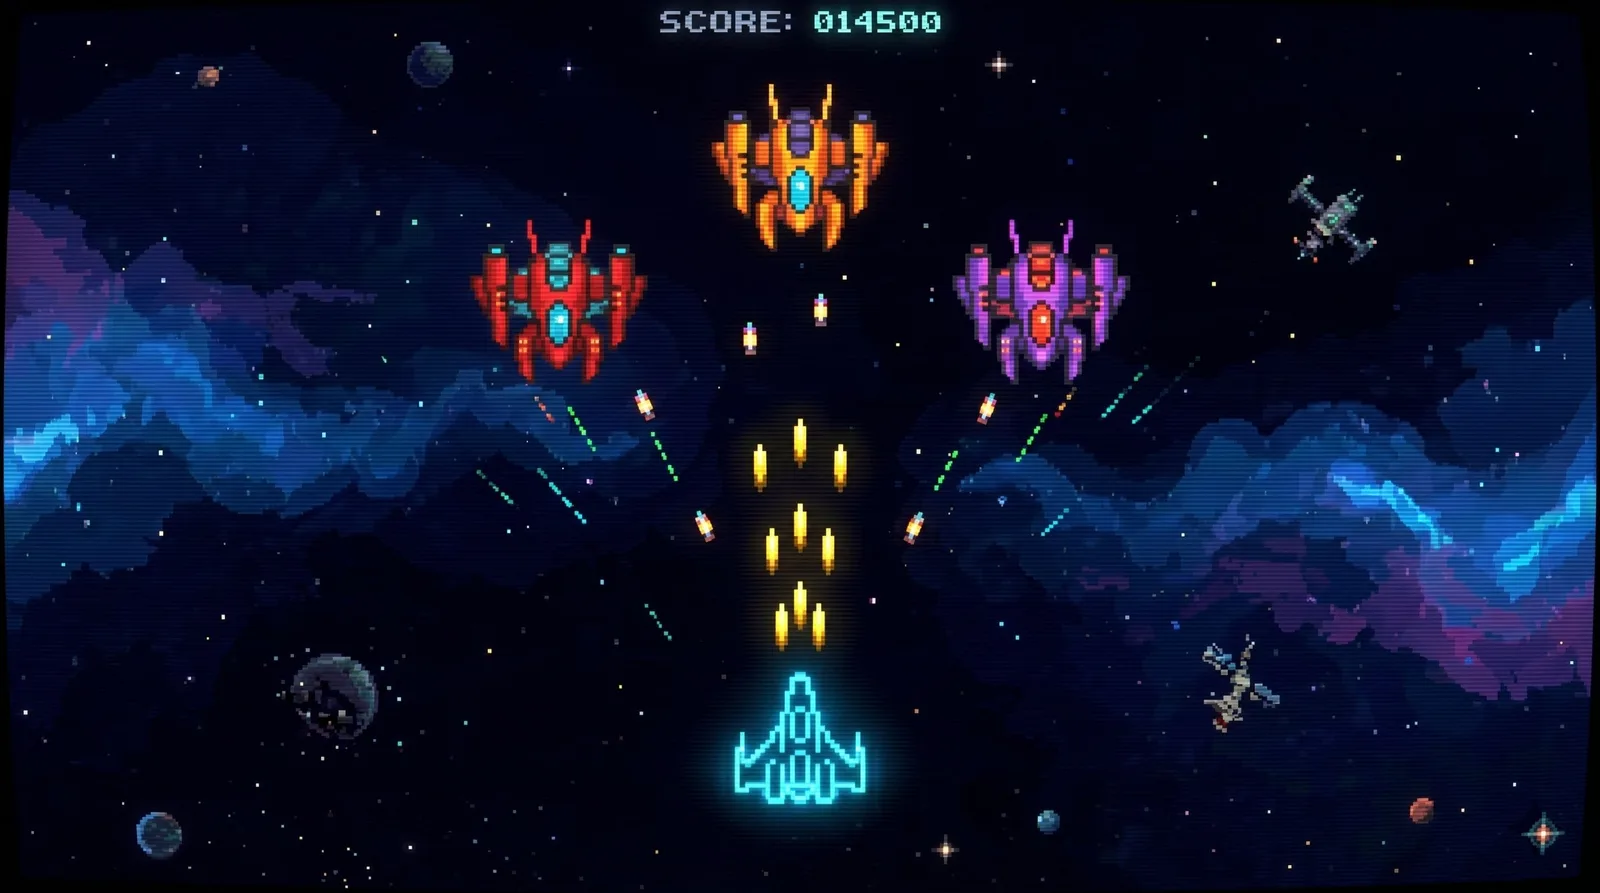
Pixel art style, dark space background, neon-colored ships and enemies
## Tech Stack
Next.js + Phaser.js, pure frontend, deployed to Vercel
## Milestone Order
1. Basic scene: Background + Player ship movement
2. Shooting and collision detection
3. Enemy spawning and AI movement
4. Health/Score/Level UI
5. Visual asset replacement (sprites)
6. Sound effects
7. Release
The more detailed your PLAN.md, the closer the first version AI generates will be to your desired result, and the fewer iterations you'll need later. Don't aim for literary quality; just explain the gameplay logic clearly.
AGENTS.md: Tell Each Agent How to Work
AGENTS.md goes in the project root directory, defining the tech stack, development conventions, and tool usage. It serves as the common operating guidelines for all agents:
# Space Shooter Game

2D side-scrolling shooter game, rendered with Phaser.js, hosted on Next.js.

## Tech Stack
- Next.js (frontend framework, deployed on Vercel)
- Phaser.js (game rendering engine)
- No backend (pure frontend game)

## Skills
- $imagegen: Generate game visual assets (sprites, backgrounds, UI)
- $playwright-interactive: Run the game in a real browser and capture screenshots for verification
- $openai-docs: Get the latest OpenAI API documentation

## Development Conventions
- After completing each milestone, use the build command to verify it runs
- Refer to PLAN.md to decide the next step
- Use $playwright-interactive to test every new feature in a real browser, and save screenshots for record
- Use $imagegen to generate all sprites and backgrounds. After each generation, save the prompt to .prompts/ folder for reuse
- Keep a work log in the .logs/ directory
Once both files are ready, you can start.
Start Game Development
Use the following starter prompt to issue instructions, letting each agent start working in parallel:
Use $playwright-interactive and $imagegen to develop this game according to PLAN.md.

Divide the work as follows:
1. First, use explorer to read PLAN.md and output a specific task list for the first milestone
2. At the same time, use $imagegen to generate the first batch of visual assets:
   - Player ship sprite (pixel art, neon blue)
   - 3 enemy ship sprites (pixel art, red/orange/purple)
   - Dark starry background
   Save each image's generation prompt to the .prompts/ folder
3. Worker implements milestone 1: Basic scene setup + Player movement
4. After milestone 1 is complete, use $playwright-interactive to run it in a browser and take a screenshot to verify the result
5. Write the work log to .logs/milestone-1.md

After completion, tell me milestone 1's status and show me the screenshot.
Don't ask AI to develop all 7 milestones at once. Advance milestone by milestone, check the effect after each one, and only proceed if everything looks good. That way, if something goes wrong, it's easier to pinpoint.
Tip: Before starting, make sure these tools are ready—
$imagegen,$playwright-interactive,$openai-docsare Skills officially provided by OpenAI. They need to be declared and enabled inAGENTS.mdbefore Codex loads them; they are not automatically available.
exploreris a read-only agent built into Codex. It works out of the box with no configuration needed, and is dedicated to reading and analyzing code without making modifications.
Iteration Methods
Development is not perfect on the first try. Here are three most commonly used iteration methods.
1. Use Screenshot Feedback
After getting a screenshot, directly describe the problems you see:
Here's the current effect screenshot: [screenshot]
The enemy ships move too fast, making the difficulty too high.
The player ship sprite is too small and doesn't stand out.
Please adjust these two points and show me another screenshot.
Screenshots are the most direct feedback medium, much more precise than describing "something feels off" in words.
2. Visual Style Adjustments
The background is too dark to see the ship clearly.
Use $imagegen to regenerate the background. Requirements: deep blue starry sky with some nebula effects, increase brightness by 20%.
Update the new prompt to .prompts/background.md.
Every time you adjust a visual asset, have the agent also update the record in .prompts/ folder. The reason is explained in the next section.
3. Add New Features
Add a Boss enemy to Level 3:
- 3 times the size of a normal enemy
- Has its own health bar UI
- Has a flashing effect when hit
First update PLAN.md, then implement it, and verify with Playwright.
When adding new features, first have the agent update PLAN.md, then start implementing. This way, the design document and code always stay in sync.
A Practical Tip
Save the image generation prompts.
When using $imagegen to generate assets, always have the agent save the prompt to the .prompts/ folder. The reason is straightforward: during iteration, you may need to add new assets, and if prompts are lost, the new images won't match the old ones—the ship is pixel art, the newly added Boss becomes realistic—causing a jarring visual inconsistency.
Tip:
.prompts/folder can be organized by asset type, such as.prompts/ships.md,.prompts/backgrounds.md, making it easy to check style consistency later.
With archived prompts, when regenerating or fine-tuning, you only need to add one or two modifiers to the original prompt rather than describing everything from scratch.
Finally
This series of three articles goes from the simplest daily bug fixes, to batch automation, to multi-agent collaboration building a complete game—with increasing difficulty. The core usage of sub-agents can be summed up in one sentence: break the task into multiple parts, hand each part to a dedicated agent, and let them work in parallel. Whether analyzing code or developing a product, this approach works universally.
Next time you open your editor, try writing a PLAN.md first.
Follow on Google
Add HeyBinyang as a preferred source on Google
If you'd like to keep finding my updates through Google, you can mark this site as a preferred source and make it easier to spot in relevant reading flows.
SHARE
Share
Share this article.